There are two ways to set an image as the background of a layout in Kivy: using the canvas or using the Image widget. The differences in aspect ratio when setting these are also explained.
Setting a Layout Background Image
There are two ways to set an image as the layout background.
- Using canvas
- Using the Image widget to display an image
See the following article for details on how to set a background color in canvas.
See the following article for details on displaying images.

When using canvas, by default, the aspect ratio (ratio of height to width) may be broken because the image is adjusted to the screen. Therefore, processing is required to maintain the aspect ratio. This process is quite difficult, If the aspect ratio is corrupted, it is recommended to use the Image Widget. On the other hand, if an Image widget is used, the aspect ratio can be set with the fit_mode property. If you use a transparent image, you can also set the background color.
When using an image as a background, it is necessary to take into account the various screen sizes. For desktop applications, there may be less to consider, but for mobile applications, you need to think carefully about screen size and image size. In some cases, it may be necessary to change the image or other processes depending on the screen size.
Setting a Background Image in Canvas
Draw a rectangle in the canvas in the same way as the background color, but instead of applying a color, display an image. There is a widget box area for displaying images, so create a rectangle in that area and display the image on top of it.
When setting an image for the background, a layout that allows widgets to be placed anywhere may be more suitable, such as RelativeLayout, FloatLayout, or ScatterLayout.
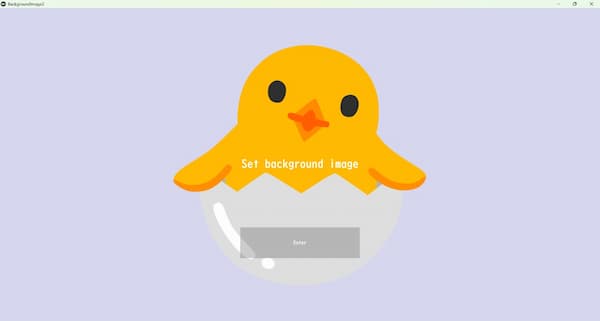
background_image1.py
from kivy.app import App
from kivy.uix.relativelayout import RelativeLayout

class RootWidget(RelativeLayout):
    pass

class BackgroundImage1(App):
    def build(self):
        return RootWidget()

if __name__ == "__main__":
    BackgroundImage1().run()
backgroundimage1.kv
<RootWidget>
    canvas.before:
        Rectangle:
            source: 'images/image-ts-002.png'
            size: self.size
            pos: self.pos
    Label:
        text: 'Set background image'
        font_size: 50
    Button:
        text: 'Enter'
        size_hint: 0.2, 0.1
        background_color: 1, 1, 1, 0.3
        pos_hint: {'center_x': 0.5, 'center_y': 0.25}
Specify the path of the image in the Rectangle creation section of canvas.before.
source: 'images/image-ts-002.png'Other widgets need to be positioned using the pos_hint property, for example. The size of the widget should be adjusted with the pos_size property, etc.
Setting a Background Image With the Image Widget
This is the same as the normal image display. It is just a background image placed on the bottom layer.
background_image2.py
from kivy.app import App
from kivy.uix.relativelayout import RelativeLayout

class RootWidget(RelativeLayout):
    pass

class BackgroundImage2(App):
    def build(self):
        return RootWidget()

if __name__ == "__main__":
    BackgroundImage2().run()
backgroundimage2.kv
<RootWidget>
# Background color
canvas.before:
Color:
rgba: 214/255, 214/255, 238/255, 1
Rectangle:
size: self.size
pos: self.pos
# Use as background in the normal image display method.
Image:
source: 'images/image-ts-002.png'
fit_mode: 'scale-down' # default
Label:
text: 'Set background image'
font_size: 50
Button:
text: 'Enter'
size_hint: 0.2, 0.1
background_color: 1, 1, 1, 0.3
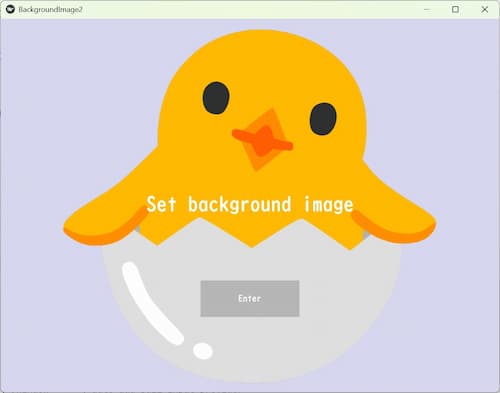
pos_hint: {'center_x': 0.5, 'center_y': 0.25}The background image in this code uses a transparent image, so the background color can be set together.
    canvas.before:
        Color:
            rgba: 214/255, 214/255, 238/255, 1
        Rectangle:
            size: self.size
            pos: self.pos
The methods and properties of the Image class can be used in the same way as for normal image display; the fit_mode property has a mode to stretch the image while maintaining the aspect ratio, so it can be used as needed.
Image:
    source: 'images/image-ts-002.png'
    fit_mode: 'scale-down' # default
Aspect Ratio of the Two Apps
Here are the results of running the two apps. Compare the aspect ratios.
Result of setting background image in canvas
The image spreads horizontally wider than the original image and fits the screen size.
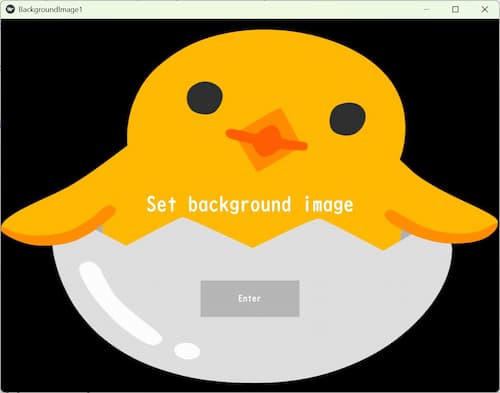
When the screen is maximized, the image spreads further horizontally and the aspect ratio is broken. This is a bad example.
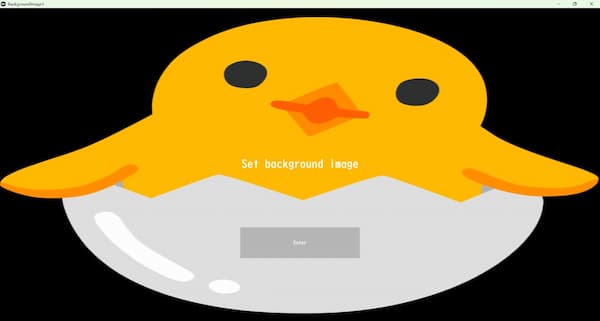
Result of setting a background image with the Image widget
The aspect ratio is maintained, so the original image is displayed as it is.
The aspect ratio is maintained even when the screen is maximized. This is a good example. However, I should have adjusted the buttons a little more.
In this case, fixing the size of the buttons was the right choice.
size_hint: None, None
width: 200
height: 100
I think the chick in the first image is cuter.
Comment