This section describes how to set up Android and apk files for the configuration file (spec file) of the Buildozer library, which converts Kivy apps to Android and iOS app files.
Android Spec File Configuration Items
Please refer to the previous article on how to install Buildozer.
Although Buildozer can convert IOS app files as well, this time we will explain the configuration for Android only. If the configuration file is not written correctly, it may not be created with an error or may crash when the application is launched on an actual device or emulator.
In the spec file, remove ‘ # ‘ only from the items you want to change. The items with ‘ # ‘ removed by default are the ones that should be changed. Other items are created with default values, so it is better not to remove ‘ # ‘ if it is not necessary.
How to Write a Spec File
The syntax of the spec file adopts Python’s configparser. Section names and keys must not be changed.
# Comments are sharp
[section name]
key = value
Type Compliance
If the type is indicated by parentheses at the beginning of the comment, write it with this type. Basically, you can write them by following the default format.
(str): string, character string type
(int): integer, numeric type (integer)
(bool): boolean, boolean value (True, False)
(list) : comma-separated list
Comments Are Not Inlined
As written at the end of the spec file text, do not write comment statements next to values.
title = My Application # This is not a comment, but part of the titleDo Not Indent Values on Multiple Lines
Indenting as shown below will be recognized as part of the string. Do not indent a value across multiple lines or on new lines.
title = My Application
          sub title # Do not break the value on a new line
title = My Application
package.name = myapp # This will all be part of the titleItems to Set for Creating APK
These are the basic configuration items for the app, not just the APK.
Set the Title of the App
Set the title of the app. It is better not to use model dependent characters or pictograms.
title = app.The value specified here will be displayed as the name of the app.

Set the Package Name
The package name will be as follows, and “myapp” at the beginning will contain the value specified here.
myapp2-0.1-arm64-v8a_armeabi-v7a-debug.apk
package.name = myappSetting Up the Domain
Mobile apps use a domain name as a unique name to identify your app worldwide If you are creating an AAB, this is a required field If you want to distribute your app on Google Play using AAB, you need to get a domain, as inappropriate domain names are not allowed Please note that this is a required field.
package.domain = org.testSet Up the Files to Be Packaged
List all of the file extensions included in the package. List all of the source code and resource files.
source.include_exts = py,kv,java,kt,png,jpg,gif,mp4,mp3,ttf,ttcThe comment for this item says “leave blank to include all files” but this did not work. The files are created but when I start the application, it crashes. It is better to describe it accurately.
Set the Version of the App
Specify the version of the app.
version = 0.1Set the Library to Be Used
You need to specify which external libraries you are using, but you do not need to specify the Pytnon standard libraries.
requirements = python3,kivy,pango,pandas,numpyFor KivyMD.
requirements = python3,kivy,kivymd,materialyoucolor,exceptiongroup,asyncgui,asynckivy
# This didn't work.
requirements = python3,kivy,https://github.com/kivymd/KivyMD/archive/master.zip,materialyoucolor,exceptiongroup,asyncgui,asynckivyConfigure Presplash
Presplash is the loading image that is displayed during application startup. By default, it is a Kivy icon, so you should create one.

Presplash images should be created according to Android specifications.
presplash.filename = %(source.dir)s/icons/android-icon.jpgThe above path is an example for the following configuration
Project folder
+-----fonts folder
+-----+---file.ttf
+-----icons folder
+-----+---file.jpg
+-----main.py
+-----kv.kv
In case of presplash in lottie format, set the following
android.presplash_lottie = "path/to/lottie/file.json"To set the background color, specify in RGB hexadecimal or ARGB hexadecimal or color name. See the comments in this section for available color names.
android.presplash_color = oliveSetting the Application Icon and Adaptive Icon
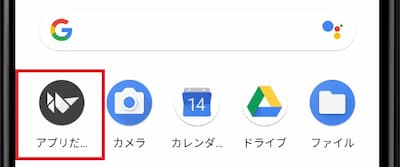
Application icons and adaptive icons are icons that are displayed on the home screen. Kivy icons are displayed by default, so it is better to create them.

Icon images should be created according to Android specifications.
The application icon is set with the following items.
presplash.filename = %(source.dir)s/icons/app-icon.jpgThe above path is an example for the following configuration
Project folder
+-----fonts folder
+-----+---file.ttf
+-----icons folder
+-----+---file.jpg
+-----main.py
+-----kv.kv
Adaptive icons are set by the following items. (Android API level 26 or higher)
icon.adaptive_foreground.filename = %(source.dir)s/icons/adaptive-icon-fg.png
icon.adaptive_background.filename = %(source.dir)s/icons/adaptive-icon-bg.png
Setting the Orientation of the Screen When the Application Is Launched
Set the orientation of the screen when the app is launched. I thought it was a setting for the screen orientation allowed for the application, but since it can be rotated, I am not sure which one it is.
- portrait: Portrait orientation
- landscape: landscape orientation
- portrait-reverse: reverse portrait
- landscape-reverse: reverse landscape
orientation = portraitSet Target API and Android SDK Version
This corresponds to the target API in the Android manifest file. Check the Android specification for API-related details.
Please remove the ‘ # ‘ in the comment.
android.api = 34Set the version of the Android SDK to be used to the same value.
android.sdk = 34Set the Minimum API Level
Set the minimum API level for the Android application. Remove the ‘ # ‘ from the comment.
android.minapi = 28Set the version of the Android NDK API to be used to the same value.
android.ndk_api = 28Android NDK Version
Android NDK version is 25b by default, but using a higher version will cause an error. 25c, the last version of 25, can be used.
android.ndk = 25cPython for Android
Buildozer uses Python-for-Android (formerly known as p4a), so you can use most of the features of this.
When a Crash Occurs in the Android Application
There are several causes of crashes when launching an Android application, such as resource file paths not being retrieved properly or incorrect library information.
Causes of Application Crashes
- Check that the resource files used are correctly described in source.include_exts.
- Use absolute paths for these file references in the code.
- Library information is not described correctly.
source.include_exts = py,kv,java,kt,png,jpg,gif,mp4,mp3,ttf,ttcrequirements = python3,kivy,pango,pandas,numpyPlease refer to the following for how to obtain absolute paths.
Check If the Resource File Has Been Obtained
The apk file is a compressed file, so you can check the contents by changing the extension to “zip” or something similar. The source code and resource files are stored in the assets folder, so if there are no resource files there, the file cannot be obtained.
- Copy the apk to Windows and change the extension to “zip
- Unzip the above (in Windows, right-click and [Extract All]).
- There is a private.tar compressed file in the assets folder, so unzip that as well.
- Check to see if all the resource files used in the application are included.
- If not, check the paths in the code and the source.include_exts entry.


Comment